Showing posts with label Oracle. Show all posts

Wednesday, April 1, 2015

Oracle VirtualBox: Using Fedora As Your Development Desktop Part 1


In our previous series we've gone over how to install Ubuntu Server on Oracle VirtualBox to use it as a server.  In this series we will go over how we can use the Fedora desktop as your developer's machine/virtual machine.  Having a Linux developer machine is great because a lot of the more expensive Windows developer's program are expensive.  There's usually a Linux equivalent application that is comparable to their Windows big brother that are usually free or a lot less expensive.  Also most Java technologies work better on Linux than Windows.  So let's begin on journey into the Linux desktop experience.
  1. First thing you need is the latest Fedora Desktop distribution, you can get it here at https://getfedora.org/en/workstation/

    Download the "Live Image" option.
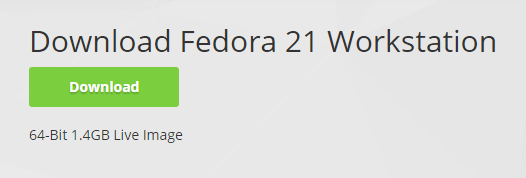
    Fedora-Live-Workstation-x86_64-21-5.iso
2. Launch VirtualBox and click on the "New" button

3. The "Create Virtual Machine" dialog box will be displayed, input the following information


4. It's important that you select 64-bit system, from the drop down if you want to install a 64-bit version of Fedora

5. Give your virtual machine 2 GB of memory to start off with, you can increase this value later, if needed.  Two GB should be enough for most tasks.  You don't want to allocate too much memory to your VM machines.

6.  Click "Next"

7.  Select "Create a virtual hard drive now" option


8.  Click "Create"

9. On this screen you will see the flexibility of VirtualBox you can actually create Microsoft Virtual Machines with VirtualBox, it's the best of both worlds.  Select "VDI (VirtualBox Disk Image)" to create a VirtualBox Disk Image.  Then click "Next"


10.  Select "Dynamically allocated" option, this will grow your disk as needed. Then click "Next"


11. The next screen is the "File location and size" screen.  I gave my VM 25 GB, but you can give the amount of disk space that you are comfortable with.  After you've allocated the disk space, click the "Create" button.


12. Now you have a new virtual machine ready for a Fedora Desktop in VirtualBox


Oracle VirtualBox: Using Fedora As Your Development Desktop Part 1

In our previous series we've gone over how to install Ubuntu Server on Oracle VirtualBox to use it as a server.  In this series we will go over how we can use the Fedora desktop as your developer's machine/virtual machine.  Having a Linux developer machine is great because a lot of the more expensive Windows developer's program are expensive.  There's usually a Linux equivalent application that is comparable to their Windows big brother that are usually free or a lot less expensive.  Also most Java technologies work better on Linux than Windows.  So let's begin on journey into the Linux desktop experience.
  1. First thing you need is the latest Fedora Desktop distribution, you can get it here at https://getfedora.org/en/workstation/

    Download the "Live Image" option.

    Fedora-Live-Workstation-x86_64-21-5.iso
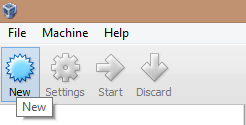
2. Launch VirtualBox and click on the "New" button

3. The "Create Virtual Machine" dialog box will be displayed, input the following information


4. It's important that you select 64-bit system, from the drop down if you want to install a 64-bit version of Fedora

5. Give your virtual machine 2 GB of memory to start off with, you can increase this value later, if needed.  Two GB should be enough for most tasks.  You don't want to allocate too much memory to your VM machines.

6.  Click "Next"

7.  Select "Create a virtual hard drive now" option


8.  Click "Create"

9. On this screen you will see the flexibility of VirtualBox you can actually create Microsoft Virtual Machines with VirtualBox, it's the best of both worlds.  Select "VDI (VirtualBox Disk Image)" to create a VirtualBox Disk Image.  Then click "Next"


10.  Select "Dynamically allocated" option, this will grow your disk as needed. Then click "Next"


11. The next screen is the "File location and size" screen.  I gave my VM 25 GB, but you can give the amount of disk space that you are comfortable with.  After you've allocated the disk space, click the "Create" button.


12. Now you have a new virtual machine ready for a Fedora Desktop in VirtualBox


Saturday, March 14, 2015

Oracle VM VirtualBox : Making VirtualBox Fullscreen by Installing Guest Additions In Linux

If you've installed an operating system in VirtualBox before you've probably noticed the screen is really small even when you switch to Fullscreen mode.  It's so small that you can't even see the fonts for the icons if you have a desktop GUI installed.  To fix this problem VirtualBox provides us with the Guest Additions tool.  Which enables the virtual machine to be viewed at fullscreen.

To enable full screen on a Linux operating system.  Perform the following actions, this should work on all Linux distribution that VirtualBox supports.

1.  Start the virtual machine that you want to make full screen


2.  Log into your GUI desktop


3.  Click on "Devices" and then select "Insert Guest Additions CD Image"


Note: If you get the message "Unable to insert the virtual optical disk C:", Most likely you've already mounted the "Guest Additons" ISO on your virtual machine, so you should be good to go.


4. Start a terminal session, by searching the word "terminal" on the search box (GNOME).  Then click on the "Terminal" icon


5.  In your terminal session type "mount", you will see that VBOXADDITIONSxxxx has been mounted in your virtual machine with the path /media/....


6.  Switch to the VBOXADDITIONSxxxx folder, by typing in "cd /media/techjunkie/VBOXADDITIONS_4.3.22_98236/", the folder "techjunkie" is my user's home directory so your folder name will be different, and the numbers at the end of the VBOXADDITIONS...  is the version number so your number might be different.


7.  type "ls", you will see the file "VBoxLinuxAdditions.run"


8.  Type "sudo ./VBoxLinuxAdditions.run" in the terminal window


You will be asked for the sudo password, so enter the password and then press "Enter"


9.  The installation will take place automatically


10. Restart your virtual machine with the command "sudo reboot now" or restart the virtual machine itself in VirtualBox,  I prefer the second method, just to make sure.


Oracle VM VirtualBox : Making VirtualBox Fullscreen by Installing Guest Additions In Linux

If you've installed an operating system in VirtualBox before you've probably noticed the screen is really small even when you switch to Fullscreen mode.  It's so small that you can't even see the fonts for the icons if you have a desktop GUI installed.  To fix this problem VirtualBox provides us with the Guest Additions tool.  Which enables the virtual machine to be viewed at fullscreen.

To enable full screen on a Linux operating system.  Perform the following actions, this should work on all Linux distribution that VirtualBox supports.

1.  Start the virtual machine that you want to make full screen


2.  Log into your GUI desktop


3.  Click on "Devices" and then select "Insert Guest Additions CD Image"


Note: If you get the message "Unable to insert the virtual optical disk C:", Most likely you've already mounted the "Guest Additons" ISO on your virtual machine, so you should be good to go.


4. Start a terminal session, by searching the word "terminal" on the search box (GNOME).  Then click on the "Terminal" icon


5.  In your terminal session type "mount", you will see that VBOXADDITIONSxxxx has been mounted in your virtual machine with the path /media/....


6.  Switch to the VBOXADDITIONSxxxx folder, by typing in "cd /media/techjunkie/VBOXADDITIONS_4.3.22_98236/", the folder "techjunkie" is my user's home directory so your folder name will be different, and the numbers at the end of the VBOXADDITIONS...  is the version number so your number might be different.


7.  type "ls", you will see the file "VBoxLinuxAdditions.run"


8.  Type "sudo ./VBoxLinuxAdditions.run" in the terminal window


You will be asked for the sudo password, so enter the password and then press "Enter"


9.  The installation will take place automatically


10. Restart your virtual machine with the command "sudo reboot now" or restart the virtual machine itself in VirtualBox,  I prefer the second method, just to make sure.


Friday, March 13, 2015

Oracle VM VirtualBox : Install A Desktop GUI on Ubuntu Server Part 4

The topic of installing a desktop GUI has been debated over the years.  Friendships have been ruined because of it.  I don't know if that's true, but some believe that the server should only have command line.  This blog is not about that debate, I just want to see some freaking graphics on the monitor, and for my mouse to be more than a paper weight.  So there's my opinion on the subject.

Anyways installing a GUI on Ubuntu server is really easy.

Here are the steps:

1. Start up your Ubuntu server VM


2. Log into Ubuntu with your credentials


3. Make sure you have internet connection, and type in the following command without the double quotes of course, "sudo apt-get install ubuntu-gnome-desktop" 


4.  You have to confirm that your are lord sudo of the Ubuntu clan.  I mean, sudo is a command that let's you execute commands with elevated privileges.  But not all users have sudo power, only the special ones.


5.   When asked "Do you want to continue? [Y/n]", type "Y" and press "Enter"


6. The installation will take place automatically, just sit back and enjoy.


7.  After a reboot you see a login screen on Ubuntu GNOME desktop


8.  After logging in you will see the desktop home screen, click on "Activities" to see a list of actions that you can perform.


Blogs in this series:
  1. Oracle VM VirtualBox : Creating a New Virtual Machine for Ubuntu Server Part 1
  2. Oracle VM VirtualBox : Mounting the Ubuntu Server ISO on VirtualBox Part 2
  3. Oracle VM VirtualBox : Install Ubuntu Operating System on VirtualBox Part 3
  4. Oracle VM VirtualBox : Install A Desktop GUI on Ubuntu Server Part 4

Oracle VM VirtualBox : Install A Desktop GUI on Ubuntu Server Part 4

The topic of installing a desktop GUI has been debated over the years.  Friendships have been ruined because of it.  I don't know if that's true, but some believe that the server should only have command line.  This blog is not about that debate, I just want to see some freaking graphics on the monitor, and for my mouse to be more than a paper weight.  So there's my opinion on the subject.

Anyways installing a GUI on Ubuntu server is really easy.

Here are the steps:

1. Start up your Ubuntu server VM

2. Log into Ubuntu with your credentials


3. Make sure you have internet connection, and type in the following command without the double quotes of course, "sudo apt-get install ubuntu-gnome-desktop" 


4.  You have to confirm that your are lord sudo of the Ubuntu clan.  I mean, sudo is a command that let's you execute commands with elevated privileges.  But not all users have sudo power, only the special ones.


5.   When asked "Do you want to continue? [Y/n]", type "Y" and press "Enter"


6. The installation will take place automatically, just sit back and enjoy.


7.  After a reboot you see a login screen on Ubuntu GNOME desktop


8.  After logging in you will see the desktop home screen, click on "Activities" to see a list of actions that you can perform.


Blogs in this series:
  1. Oracle VM VirtualBox : Creating a New Virtual Machine for Ubuntu Server Part 1
  2. Oracle VM VirtualBox : Mounting the Ubuntu Server ISO on VirtualBox Part 2
  3. Oracle VM VirtualBox : Install Ubuntu Operating System on VirtualBox Part 3
  4. Oracle VM VirtualBox : Install A Desktop GUI on Ubuntu Server Part 4